If you’re a CMM user who hasn’t had exposure to rotary tables previously, you might be asking yourself “What’s the big deal?” Wonder no more as the answers are here!
Rotary tables have been used with CMMs for many decades and there’s a few main motivating factors behind this:
Increase CMM Capacity
CMMs are most commonly used with a stylus for measurement data collection. This means that the part to be measured needs to be accessible from all sides. This can be problematic when dealing with larger parts that are at the extremities of the CMM’s table size.
By using a rotary table in these situations, a part can be rotated and presented to the stylus. This reduces the amount gantry movement required, so if the edges of the part are out of reach whilst static, they can simply be moved into a position where they can be reached.
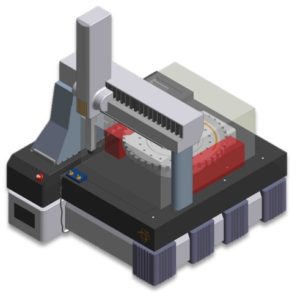
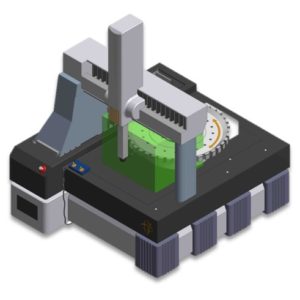
This is a concept that becomes clear when you look at the differences in the diagrams below:

Above we see that the edges of the gear being measured are not reachable by the CMM because they are at the extreme edges of the measurement area.

By rotating the same part, all measurement points of the same gear now become accessible.
Reduce Inspection Time
It is not at all uncommon within manufacturing facilities for CMMs to become an inspection bottleneck. Often CMMs can be in use for multiple shifts, inspecting parts for perhaps over 16 hours or even longer. That makes the reduction in inspection time that a rotary table affords a CMM a real benefit.
Time saving is introduced into both the setup and inspection parts of the process. Because the part is presented to the stylus more readily, the amount of stylus changes can be dramatically reduced. This is beneficial speeding up setup.
During inspection, this also applies, of course. Further, the amount of time spent on probe movement is reduced, because the active measurement volume of the CMM has been reduced, as we have seen in the diagrams earlier.
These changes can have a stark effect: It has been reported that use of a rotary table on a CMM can reduce inspection time by as much as 40%. That kind of time reduction can mean less time measuring – or more parts measured, of course. Either way, it’s a win-win outcome.
Improve Measurement Uncertainty
When you use a rotary table with a CMM, measurement certainty is also boosted. Why is this? Essentially it is due to the same key aspect that allows the other two benefits: Reduced measurement area volume. If the measurement stylus is traveling less distance to measure, less uncertainty is introduced. A high quality CMM rotary table, such as offered by the Quadrant range, can offer positional repeatability of as little as 0.5 arc seconds (0.00014 degrees). That means that the uncertainty contribution from the rotary table is minimal.
So there you have it – three reasons that integrating a rotary table with a CMM can be beneficial to your inspection process. It would be well worth considering specifying a rotary table if you are in the process of purchasing a new CMM. If you have an existing CMM fear not, in the vast majority of cases it is perfectly possible to retrofit a table to your CMM. It acts as a fourth axis and is usually a straight forward device to integrate with.
Decades of integration work has made the RPI Quadrant range the world leader in this area. If you’d like to know more, we’re always happy to talk to you about it.
