Aerospace manufacturing faces several unique challenges due to the complexity, precision, and safety standards required in the industry. Aerospace projects often have long development and production timelines, which makes managing the supply chain complex. Manufacturers must ensure a steady supply of high-quality parts from a global network of suppliers, all while meeting tight delivery schedules. Any delays or disruptions can impact the entire production line, leading to costly setbacks. That's where high precision rotary tables for aerospace manufacturing help create solutions.
A high precision rotary table allows for accurate rotational positioning, enabling manufacturers to machine intricate parts with minimal error, reducing the risk of deviations from design specifications.
High precision rotary tables also enable multi-axis machining, which simplifies the manufacturing of complex geometries in a single setup. This ensures greater consistency and precision during both the machining and assembly phases, reducing potential errors that could occur during complex part assembly.
Enhance Your Precision and Efficiency with RPI's Rotary Tables
In today's fast-paced manufacturing world, precision and efficiency are more important than ever. Companies are looking for precision rotary tables for aerospace manufacturing, automotive, and heavy machinery that are pushing the boundaries of technology to produce parts faster while maintaining exacting quality standards. However, the bottleneck often lies in the inspection process, where ensuring that every part meets tight tolerances can be time-consuming. This is where Rotary Precision Instruments (RPI) rotary tables come into play, revolutionizing how companies approach high-precision inspection.
Modern manufacturing is all about striking a balance between production speed and product quality. With competition growing in industries like aerospace and automotive, companies are constantly striving to optimize their processes. Yet, as manufacturing speeds increase, the risk of defects and errors grows, especially when inspecting complex parts like turbine blades, gears, or intricate components used in aerospace engines. Click here to learn about our precision shop floor circular geometry inspection systems.
Aerospace materials such as titanium and composites can be difficult to machine due to their strength and toughness. RPI rotary tables used in precision machining provide stable, controlled rotation, which is critical for effectively machining these materials without introducing stress or distortion. This results in cleaner cuts and better surface finishes, reducing the need for additional processing and ensuring the material properties are preserved.
Benefits of RPI Rotary Tables for Your Company
Enhanced Accuracy
RPI rotary tables offer extremely high precision, ensuring that each part can be inspected from all angles without error. By adding a fourth axis to your inspection system, these rotary tables enable continuous surface scanning, eliminating the need for time-consuming manual part repositioning. This makes RPI rotary tables ideal for industries with tight tolerances, such as aerospace, where even a minor error can have serious consequences.
Increased Efficiency
With traditional inspection methods, technicians often need to stop the machine, manually adjust the part, and restart the measurement process to inspect every angle. RPI rotary tables streamline this by allowing automated, uninterrupted rotation of parts. This dramatically speeds up inspections, reducing cycle times and helping your inspection process keep pace with faster production schedules.
Optimized for Complex Parts
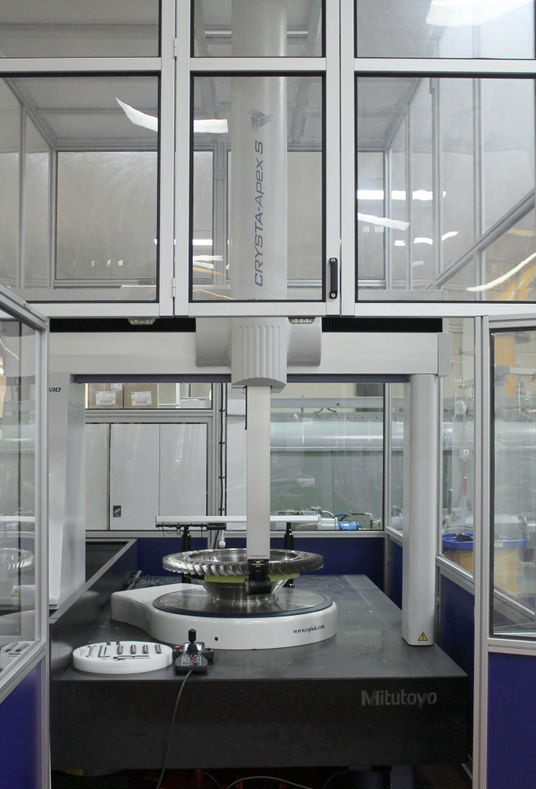
Many industries, especially aerospace and automotive, deal with complex geometries like blisks (a combination of rotor disk and blades) and IBRs (integrally bladed rotors). These components are difficult to inspect using traditional three-axis CMM systems. With RPI’s rotary tables, these parts can be rotated precisely while the CMM performs full 3D scans, capturing all the necessary data in a single pass. This helps to ensure that even the most intricate components meet strict quality standards.

Improved Data Collection
More accurate and detailed inspections result in better data. With RPI rotary tables, you can capture more data points during each scan, providing you with a fuller picture of your parts’ quality. This level of detail allows for better process control, enabling you to identify potential quality issues earlier in the production process and make adjustments as needed.
Flexibility and Integration
RPI rotary tables can be easily integrated into existing CMM systems, enhancing their capabilities without requiring a complete overhaul of your equipment. Whether you’re working in metrology labs, shop floor environments, or high-tech research facilities, RPI rotary tables provide the flexibility needed to handle a wide range of inspection tasks.
This is where inspection equipment plays a critical role. A slow or inaccurate inspection process can quickly become a bottleneck, delaying production and increasing the likelihood of defective parts reaching customers. RPI rotary tables, when integrated into high-precision CMM systems, can help prevent this by speeding up inspections while ensuring consistent, top-tier accuracy.
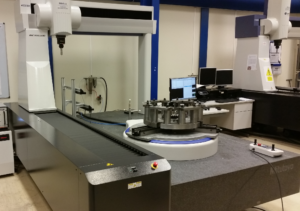
An RPI QuadSlimLine 800MBSR2 rotary table integrated with a Wenzel LH108NG coordinate measuring machine via Renishaw’s UCC S5 controller and Modus software enable a European aerospace giant to measure aero engine disks, saving up to 40% in inspection time.


